Coffee Bean Management: Your Private Bean Inventory
For a roaster, understanding and managing your coffee bean inventory is fundamental to ensuring roasting quality and tracing roasting history. The HiBean App provides a powerful and intuitive "Coffee Bean Management" feature, allowing you to systematically record and query each of your coffee beans, just like managing a library.
We call this functional module your Private Bean Inventory.
Starting with
1.5.0, HiBean includes batch-level deep inventory management. If you need the full workflow for enabling tracking, setting a warning line, running stocktakes, and reviewing analysis, go straight to the Deep Inventory Management guide.
How to Add Your Coffee Beans
We offer two ways to add your new beans to the inventory. After clicking the "+" button in the bottom right corner of the bean list page, a selection box for "Add Method" will pop up as follows:
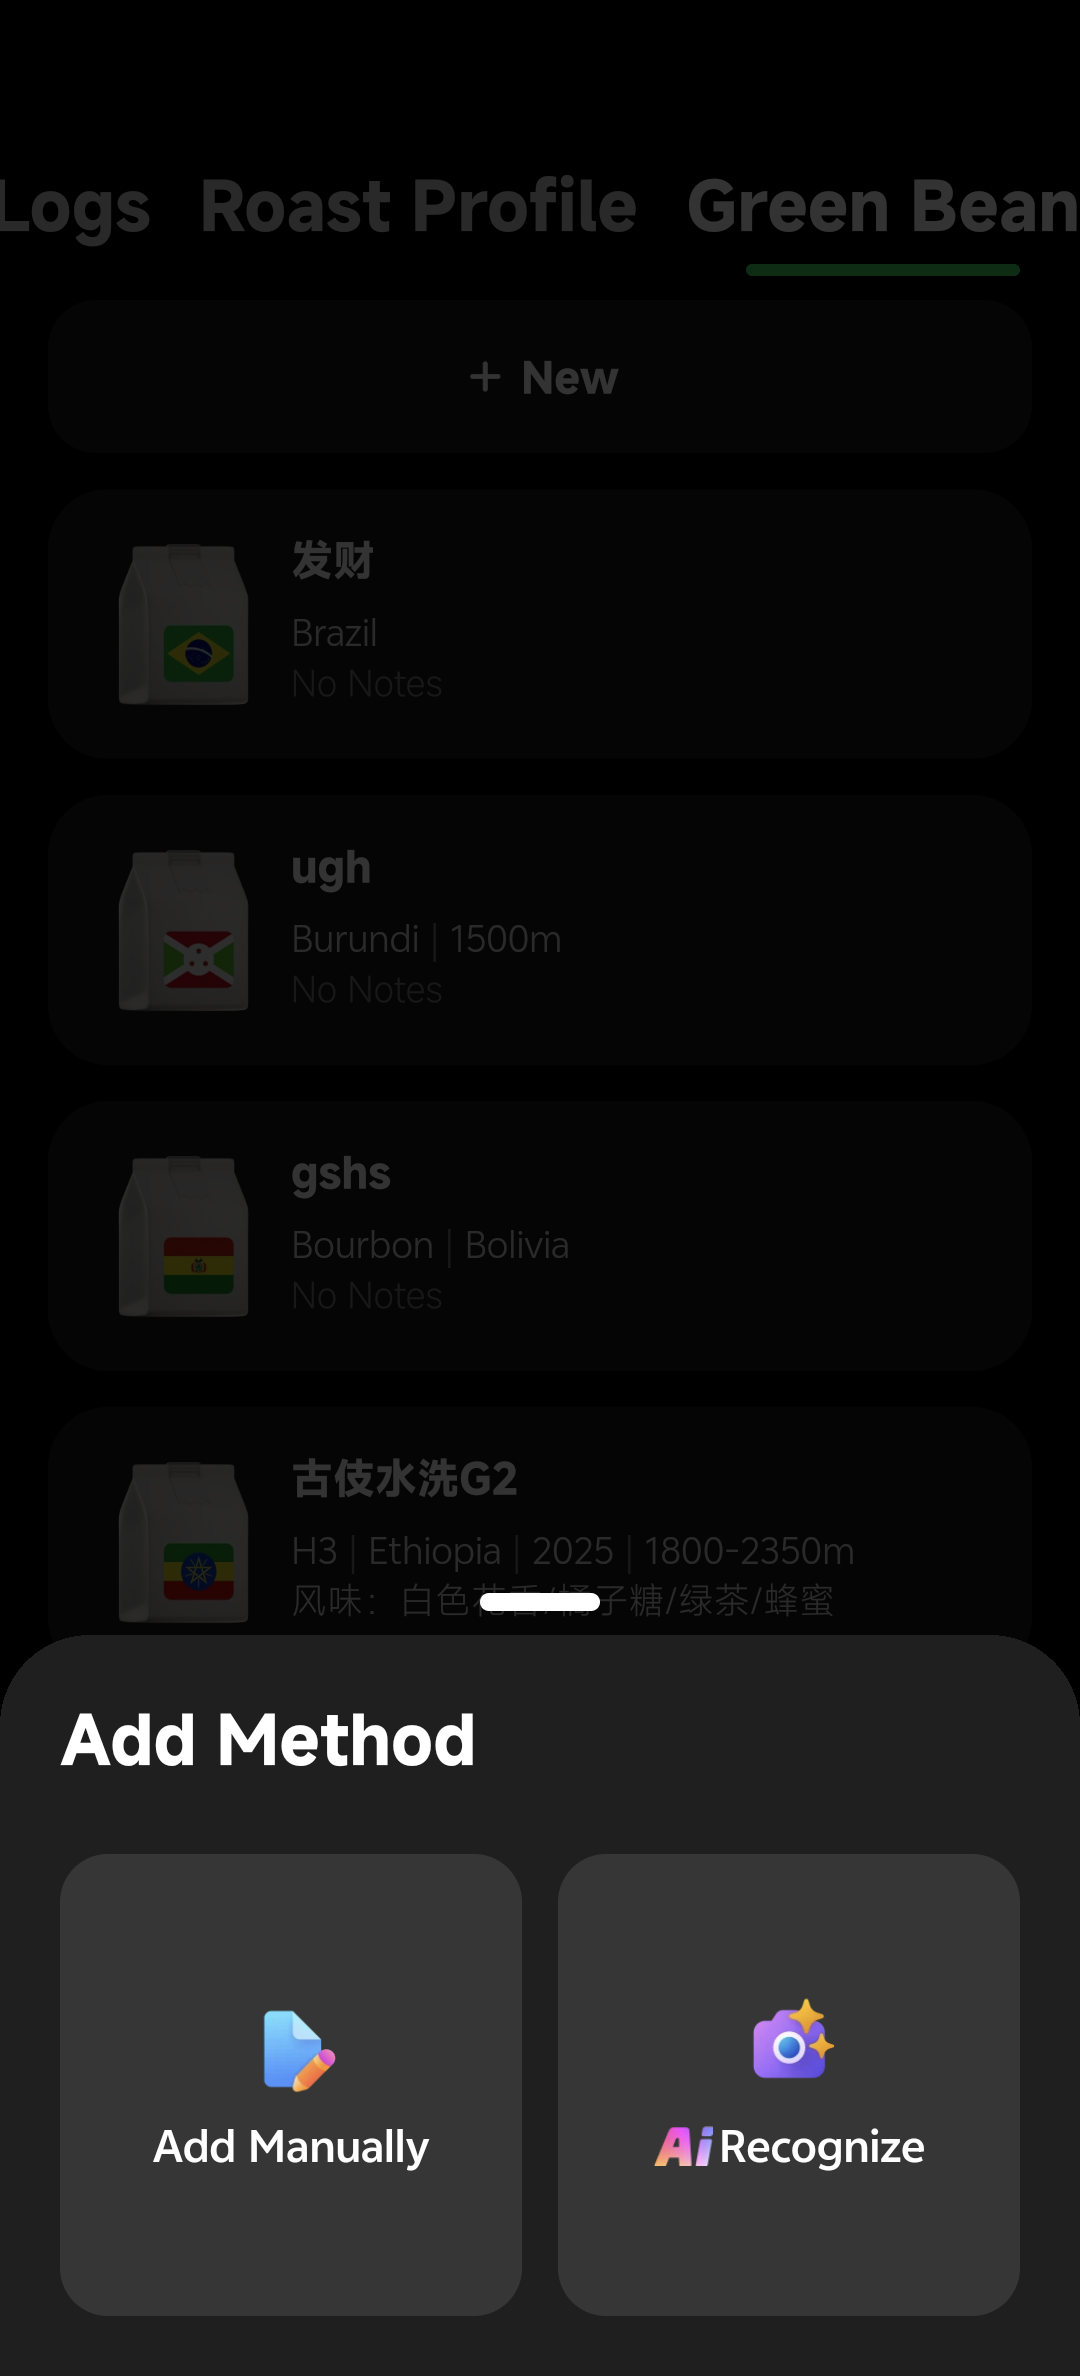
You can choose according to your preference:
- Method 1: Recognize Beans by Photo (Recommended) - Simply take a picture of the bean bag label, and the AI will automatically fill in most of the information for you.
- Method 2: Manual Entry - Fill in the detailed information about the beans item by item.
Method 1: Use AI to Recognize Beans by Photo (Recommended)
To solve the tediousness of manual input, we have introduced advanced AI image recognition technology. You can quickly archive your beans with just a simple snapshot.
In the pop-up dialog box, select "Recognize".

Point your phone's camera at the label on the coffee bean package, ensuring the label is clear and completely visible in the viewfinder, then take a picture.
Our AI will quickly analyze the text in the image like a coffee expert and automatically fill in the recognized information for you, such as:
- Origin
- Variety
- Processing
- Altitude
- Flavor description (will be filled in the notes)
- ...and other information contained on the label.
After the AI fills in the information, you will be guided to the "Edit Bean Information" page. Please be sure to check and verify whether the information recognized by the AI is accurate, and you can manually modify or supplement it.
After confirming that there are no errors, click "Save", and the beans will be successfully added to the inventory.
Please note: Although AI is good, it is not omnipotent. The accuracy of recognition is affected by the quality of the photo and the clarity of the label printing. In addition, this function may have a daily usage limit.
Method 2: Manually Enter Detailed Information
If you want to have complete control over every detail, or if your bean bag label information is incomplete, you can choose to enter it manually. After selecting "Manual Add" in the "Add Method" pop-up window, you will see the following editing page:

Follow the on-screen prompts to fill in the information item by item.
1. Core Information
- Package Icon: The app will automatically match a representative package icon for you based on the country or region after you select the origin, without manual selection.
- Coffee Bean Name: This is the only required item. Give your beans a catchy name!
2. Professional Information
This is a grid layout area that contains various key parameters about the "origin" of the beans. Click on any item to edit it.
- Origin: Select the country or region of your beans from a list containing the world's major coffee-producing regions.
- Variety: Select the variety of your beans from a professional list containing hundreds of coffee varieties. You can select more than one variety to record blend information.
- Processing: Select the processing method of the beans from the list, such as: natural, washed, honey, anaerobic, etc.
- Harvest Year: Record the harvest year of the beans.
- Altitude: Record the growing altitude of the beans in the form of a range (e.g., 1800-2000 meters).
- Moisture: Enter the moisture content of the green beans as a percentage (%).
- Density: Enter the density of the green beans in g/L.
3. Inventory and Tracking Information
These fields help you keep the batch context complete, such as vendor, price, and purchase date.
If you are looking for the 1.5.0 batch-level inventory workflow, including:
- Initial Inventory
- Inventory Check
- Warning Line
- Inventory Details and Inventory Analysis
please use the Deep Inventory Management guide.
4. Flavor Notes/Remarks
At the bottom of the page, there is a large text area for you to record additional information. You can record:
- Official flavor descriptions (e.g., strawberry, jasmine, bergamot).
- Your own cupping notes.
- Any other remarks about this bean.
5. Save
When you have filled in all the information, click the "Save" button at the bottom of the page, and your coffee beans will be successfully added to the inventory!
Why is it important to manage your bean inventory?
- Traceability: When you roast a perfect batch of coffee, you can immediately trace back to all the detailed information of this bean, providing a solid foundation for you to reproduce this success.
- Data Association: The bean information you add will be automatically associated with every roasting record made with that bean.
- Guiding Roasting: Understanding the origin, processing method, and variety of the beans can better help you make the right decisions when developing a roasting plan.
In the following chapters, we will introduce in detail how to add your first coffee bean. But for now, we recommend that you go into the app and experience this feature first.